Ever since I cast the lily ring I knew I wanted to make my wife's engagement ring.
Luckily I had some experience casting from other projects. Without that I may have not attempted it because there is so little information on the subject. I hope this article will give enough information that anyone good with their hands can make their own. Note that I only carved the ring, I had a smith cast the ring for me. I would have loved to build all of the equipment to get professional casting results but I simply didn't have the time. Getting your carving cast by a professional is surprisingly easy and affordable. In fact you can save several hundred dollars over buying a pre-made band by making it yourself. You can also have a jeweler do the more tricky bits like setting the stone. The place I bought my stone from set it for free.
Getting your ring cast by a professional is surprisingly easy and affordable. In fact you can save several hundred dollars over buying a pre-made band by making it yourself and having it cast.
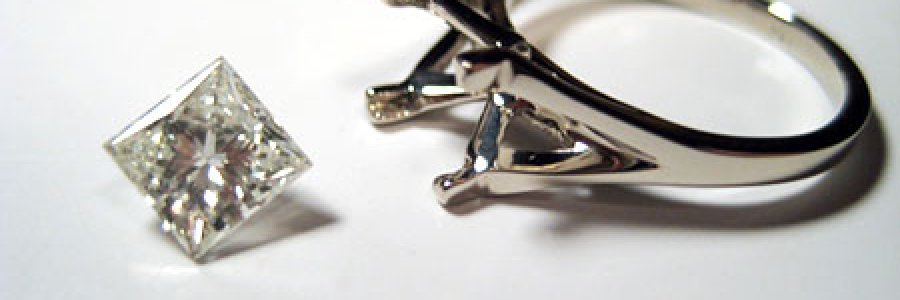
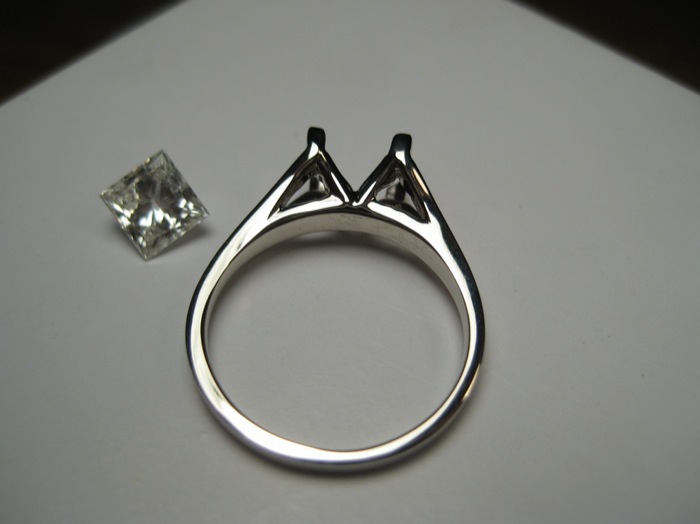
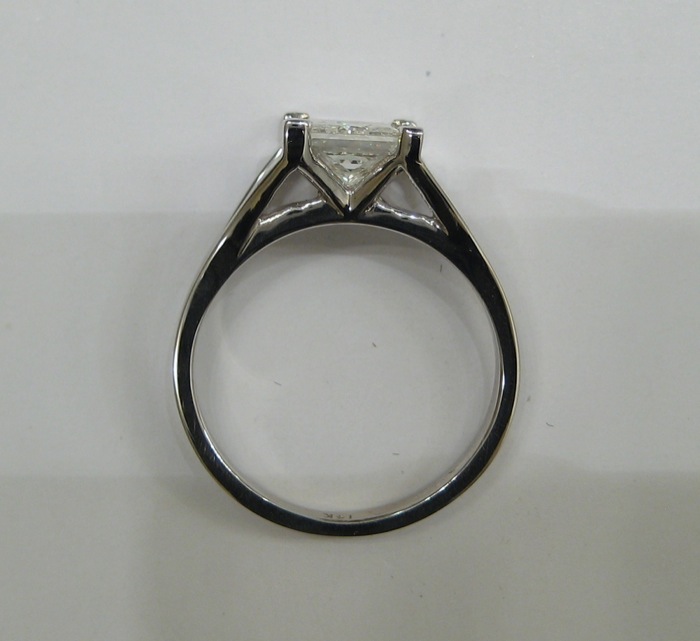
The ring design influences the tools that you will need to carve it. I wanted to make a ring with a cathedral setting, a split shank, princess cut diamond, and stone sitting low in the ring. Those were all features found on different rings, and I couldn't find a single ring that had all of those features together. With some creativity it wasn't hard to come up with a ring that had everything I wanted.
Before you can make a detailed design of the ring you will need the stone(s) or at least the intended stone dimensions so you can design the ring to fit them properly. I sketched the ring first then made a model of it in solidworks. If you don't have solidworks, graph paper at 10x scale based on the ring hole size. Then once you sketch the rest of the ring, you can measure the size of any feature in the sketch and divide the measurement by 10 to check the measurements on your carving. I made drawings of the front, side, top, and an auxiliary view of the split on the cathedral. I printed out some drawings 1:1 scale so I could lay my carving on them to make sure that it was correct. Some general design tips:
- Try to avoid unnecessarily thick or large solid features, gold is expensive so if possible hollow out thick parts from underneath etc.
- Try to avoid super thin features. The hardest part of designing the ring for me was finding a balance between too thin and too thick. I finally decided on ~.050" square for the prongs and .075" x .050" for the band.
- Make sure that there is enough support for the prongs holding the diamond. My prongs could be a little thinner because they were supported by the cathedral portion of the ring. Had they not been supported I would have to have made them .075" thick.
- It is worth taking your design by a jeweler to see what they think/if they have any suggestions. The place I bought my stone from was happy to check out my design and give me tips for free - It generates a lot of interest among jewelers when you say you are making an engagement ring yourself.
It generates a lot of interest among jewelers when you say you are making an engagement ring yourself and they want to help you out.
The next thing to do was to order the tools. I ordered most jewelry tools from Contenti:
- Wax gloss
- Economy loupe
- Stone holder
- Wax burrs
- Wax ring tube assortment
I already had the following tools but their equivalent can be gotten from Contenti
- Economy needle files
- Exacto knife (#11 Blade)
- Wax carvers
Other tools not from Contenti:
- Dial calipers (somewhat optional but extremely helpful)
- Dividers
- Hacksaw
- A dremel for the wax burrs
- Drill press -- 1/2" endmill -- 5/8" reamer
Depending on the shape and design of your ring you may need different tools.
Once you have your tools and design its time to get to work. The process varies depending on the design of the ring, but for me it went something like this:
Building
Here is a time lapse video of me carving my ring - it is sped up about 180 times normal speed and has some of the repetitive sections cut out.
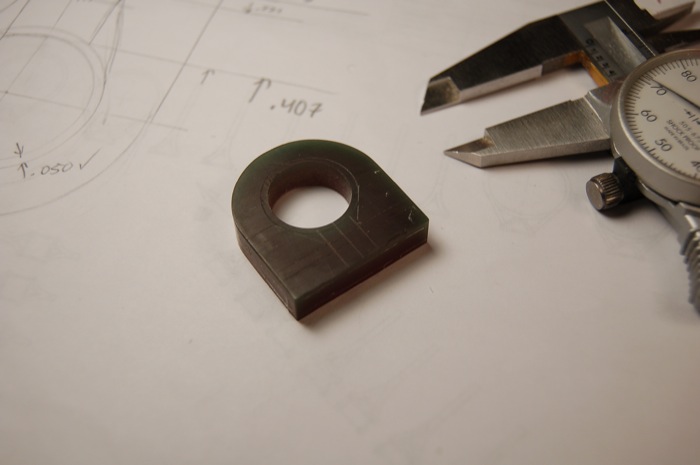
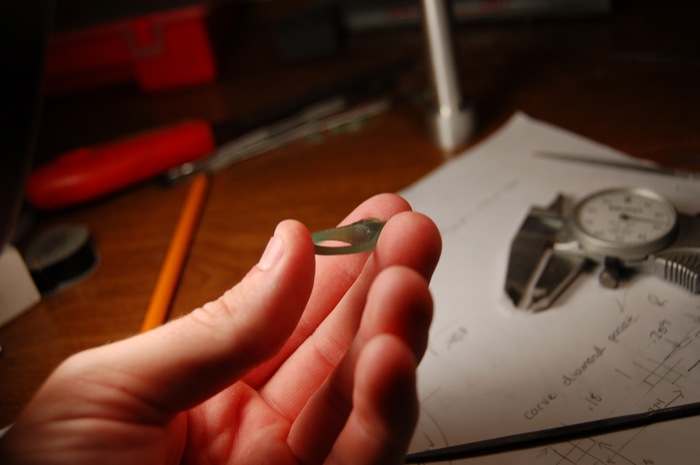
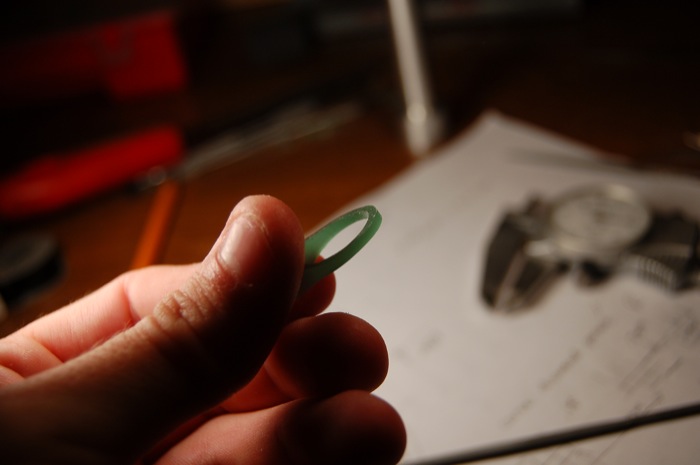
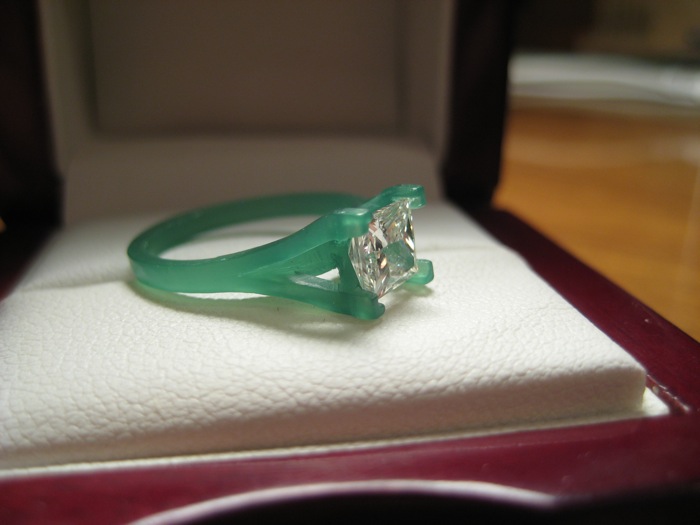
First I cut off a slice of the green ring tube using which is the hardest - I had issues with blue wax breaking. I but it slightly wider than the thickness of the ring's widest point. I first marked the cut on the tube by tracing a line all around the tube with the dividers set to the correct width then carefully cut the slice off with a hacksaw.
Next I brought the piece down to the correct thickness. I used an endmill in my drill press but this can easily be done with a wide flat file. The advantage to the endmill is that it is fast, accurate, and most importantly easy.
Now the slice has to have the hole opened up to the correct size. I actually bored the hole out in a mill (Learn about boring here) once again if you don't have a mill it is best to just get one of these tools, they are cheap and ensure that your ring is the correct size (extremely important). You twist it into the ring tube cutting away wax until you reach the mark that indicates the correct ring size has been cut. As with all dimensions I double check the inside diameter to make sure it is the correct size before proceeding. No calipers? Print out a ring size chart to scale and lay the ring on it to make sure it matches the right size.
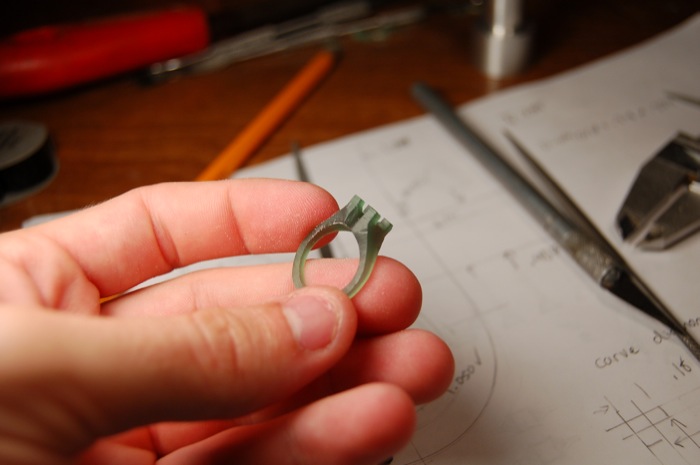
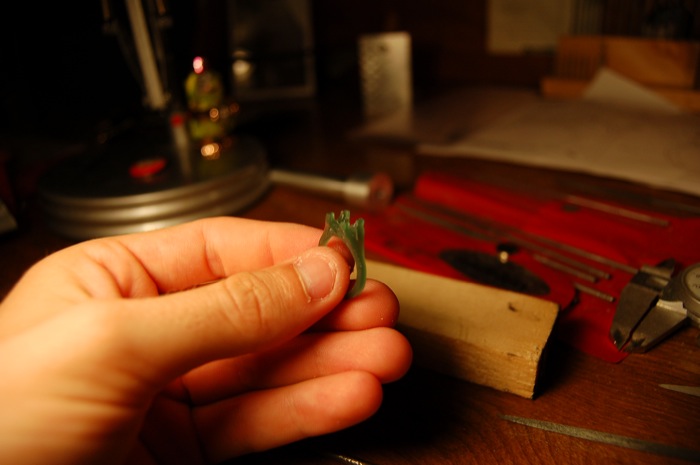
Next using my calipers, a straight edge and the compass I traced lines onto the wax blank which matched the outline of the front of the ring. I (mis)used a large reamer in my drill press to remove a lot of wax quickly cutting just shy of the traced lines.
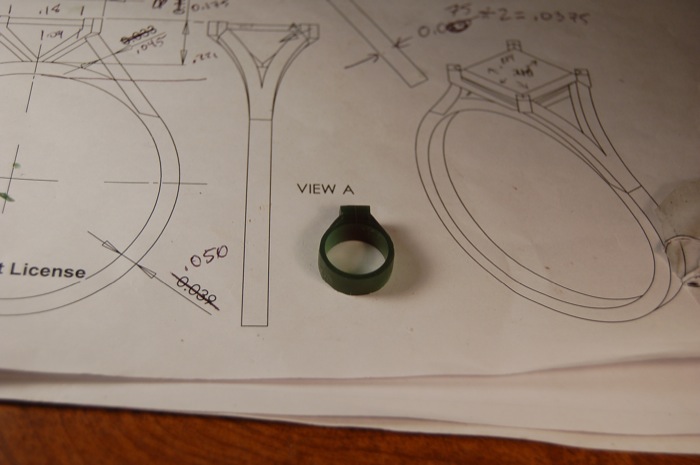
I then used needle files to carefully file up to the traced lines.
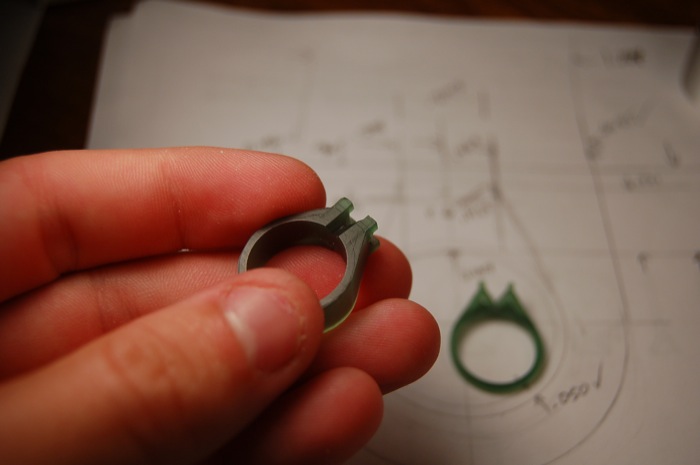
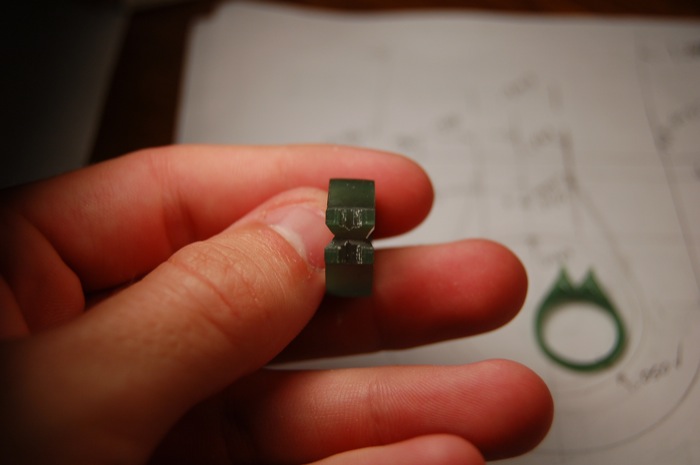
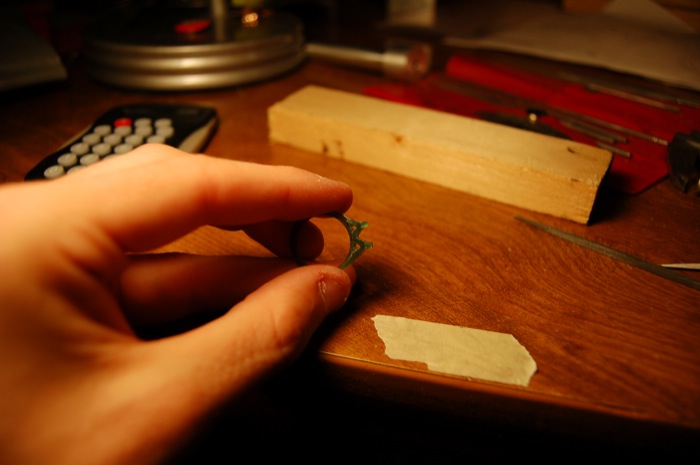
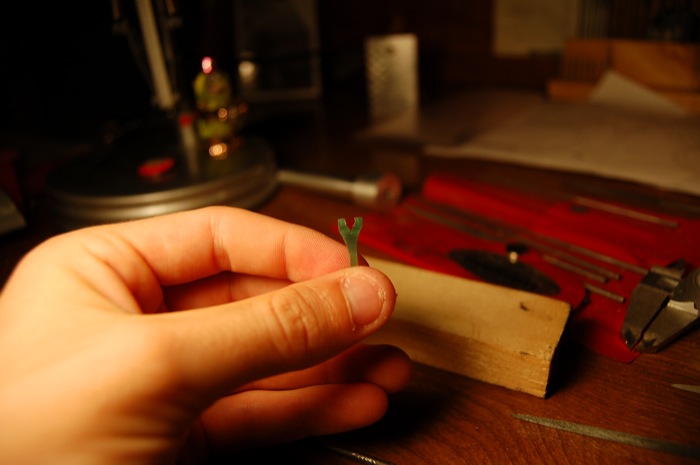
Now that I had the profile cut I made the tops of the prongs. I used an exacto knife and needle files to bring them closer to their final shape. I waited to carve the indentation in the prongs that hold the corners of the diamond.
Important note: Make the prongs taller than necessary so that the stone can be set.
Then I cut the 45 degree channels into the side of the ring. I used an exacto knife initially then a 45 degree side of a triangle needle file to precisely bring it to shape.
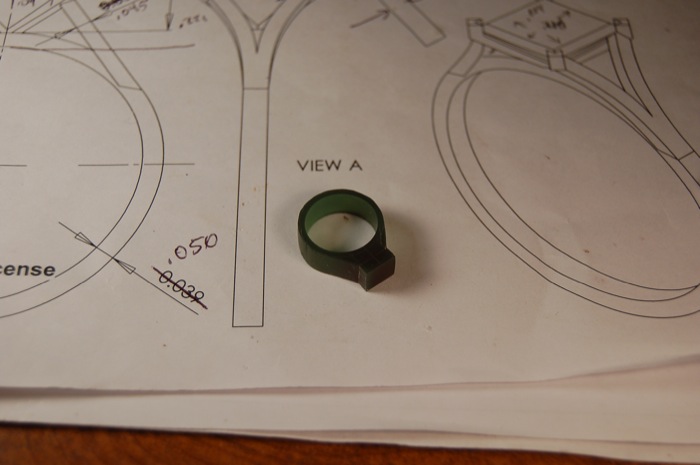
The next step was to the carve the band to the correct width. I traced two lines around the pattern that were the width of the band using the divders set to the correct to remove. I did this by resting one side of the dividers on the outside of the ring and dragging the sharp tip along the wax. I then used a wax burr in the dremel to cut away most of the wax followed by a needle file to precisely cut up to the traced lines.
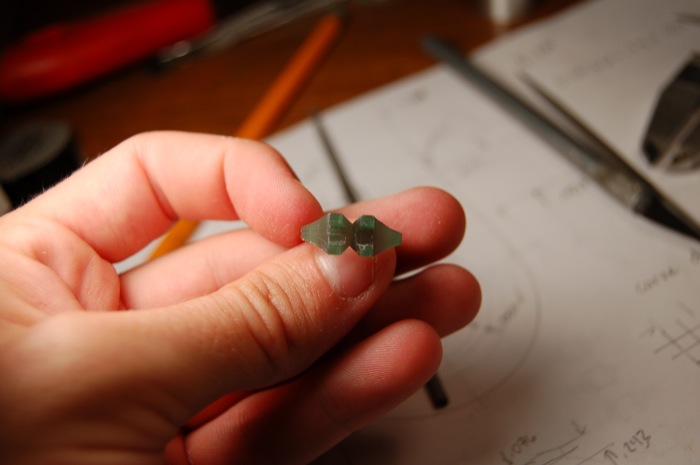
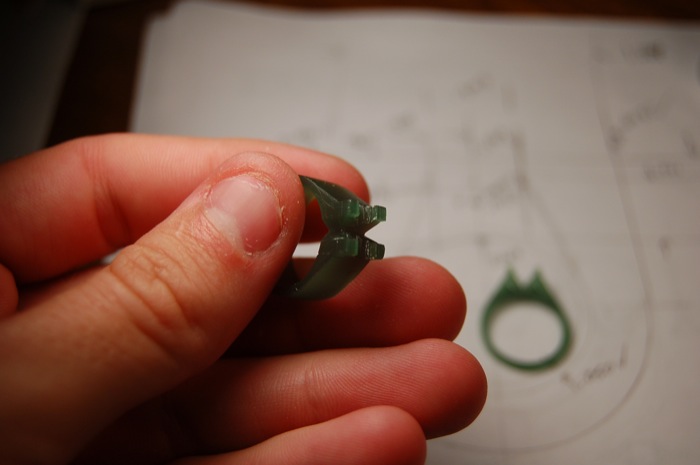
I put tape on the newly cut band to protect it while I cut the area under the prongs and cathedral area. I mainly used an exacto knife by eye then my smallest file to clean up the cut area. In order to precisely make the prongs I needed to fit them to the diamond, so I carefully cut the channels into the tops of the prong to fit the diamond. I did this very carefully with an exacto knife, measuring every cut with my calipers and testing with the diamond when I was close. The stone holder was very handy.
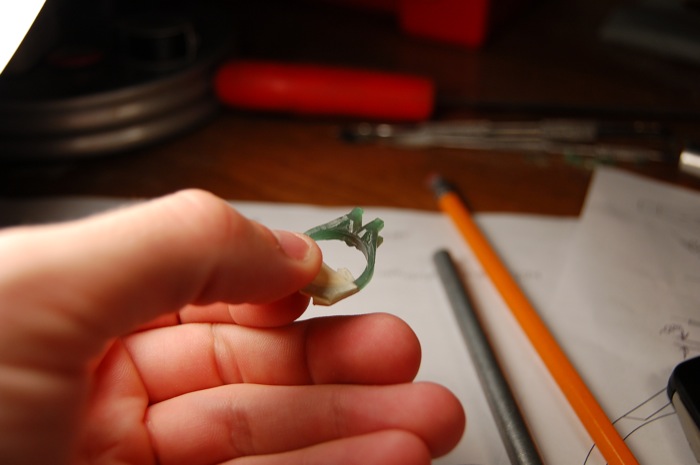
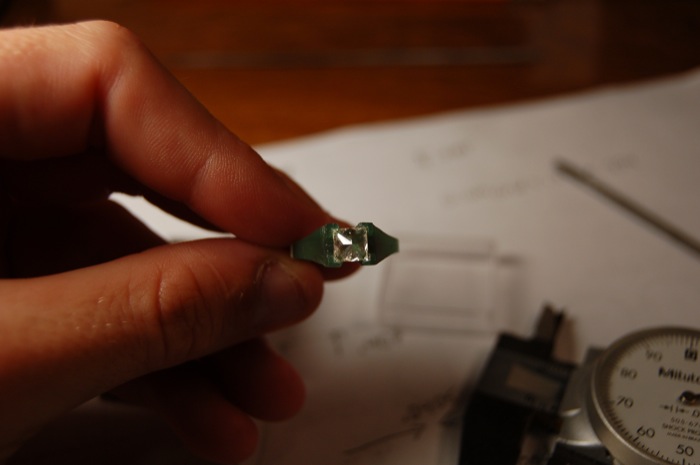
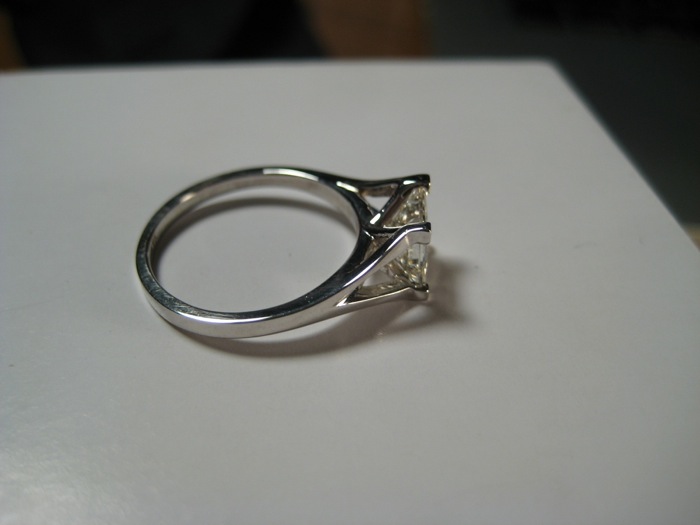
I cut the bottom side of the cathedral using an exacto knife then cleaned up the cut with a flat needle file. I then cut the inside of the cathedral the same way. Its really all about being careful and checking often to ensure the ring is looking the way it should. I then cut the seat for the stone. This involves carefully carving away an angled surface below the top of the prongs that matches the diamond, then filing it smooth, checking religiously to ensure the stone fits well.

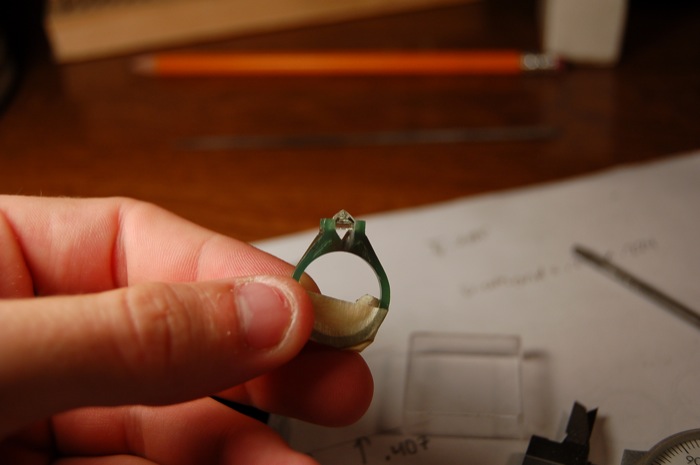
Finally I carefully went over the whole ring with my finest file making sure all of the surfaces were smooth and the corners sharp. I checked every measurement with my calipers and took off any necessary wax.
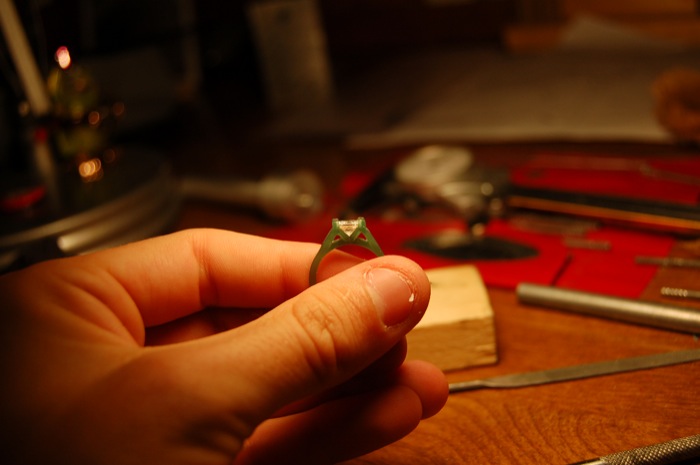
I used a piece of a woman's stocking to polish the finished ring, then went over the whole ring with a cloth dampened with the wax gloss. Remember that anything you can see on the wax will show up in the final ring so take your time.
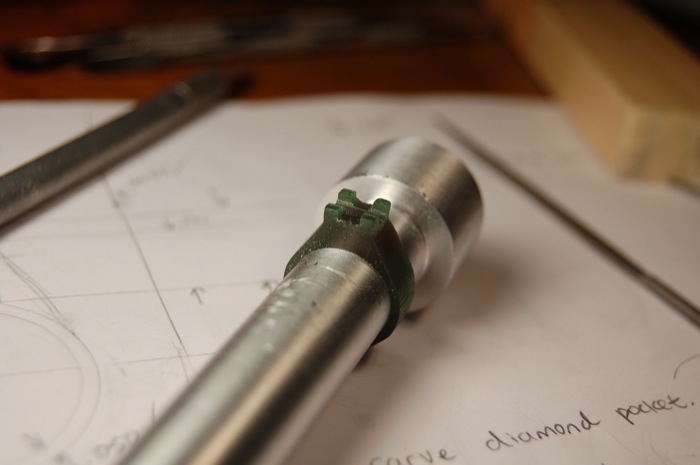
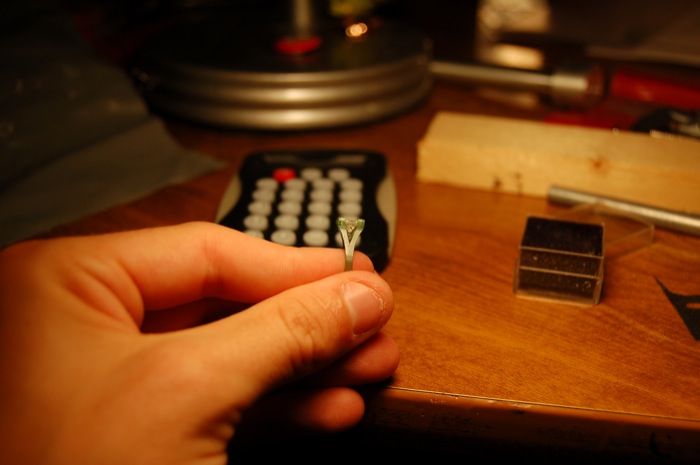
Once I had the ring done I packaged it up and sent it to a casting house that did small orders. They are called jcco casting they are pretty inexpensive - it was about $5 to cast and polish the ring plus the cost of gold. For this ring the total was less than $100. If you read my article about centrifuge casting you saw that I attached a sprue to the wax pattern. jcco will do it for you for $1 so I opted to let them do that as well. Their site has all the information you need to send them your ring just make sure you ask for them to email you a quote first.
There are many other places that will cast a single ring, I chose jcco because they were the most up front about their prices - no one else would even tell me anything without me first sending them the ring which I didn't have time to do.
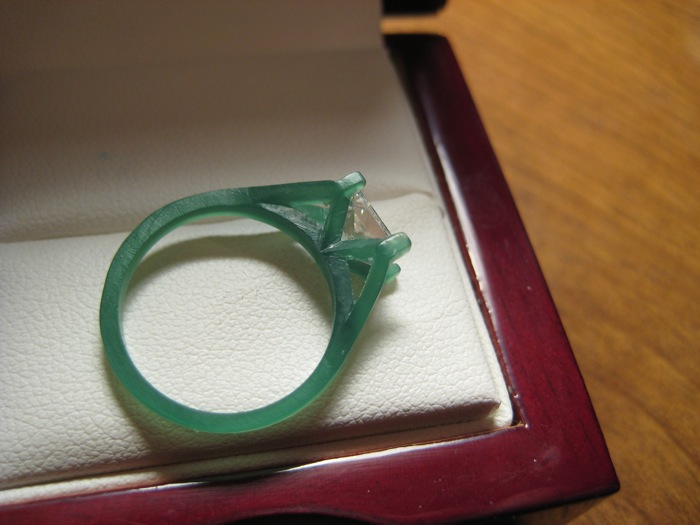
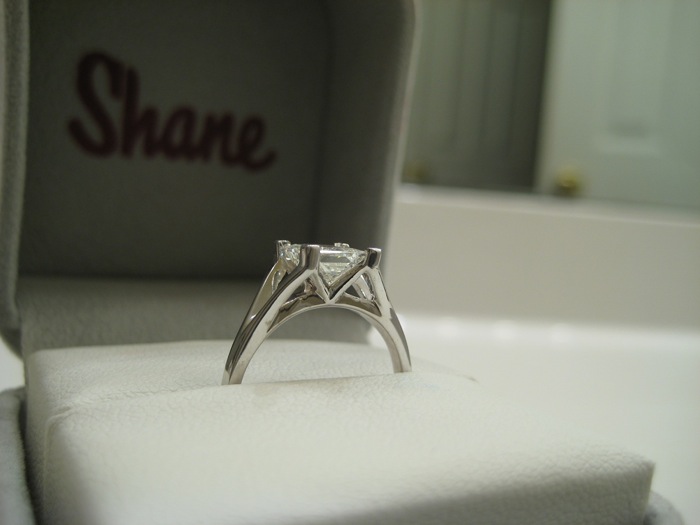
I recieved the cast ring back about 2 weeks after I sent it in, the polish on it was fantastic. I took it to the jeweler that night where they set the stone in less than an hour.
Closing Remarks Don't get discouraged if you don't get it right the first time. I made three rings before I had one that I was happy with. The key is to take your time and think about the best way to remove the wax. And be gentle! I broke two of the 4 rings I made on almost the last step...